Please find the English version below ↓
Tervetuloa takaisin onnellisen ompelun pariin! Olen ikävöinyt tietä ihanat ompeluystävät ❤
Tänään jaan kanssanne paljon pyydetyn ohjeen omien kaavapainojen tekemiseen.
Olen tehnyt ohjeesta myös videon, joka on saatavilla Skillsharessa. Mikäli siis olet jo Skillsharen käyttäjä, hyppää sille puolelle ja katso 15 minuutin pituinen videoni. Mikäli Skillshare ei ole sinulle vielä tuttu, suosittelen ehdottomasti tutustumaan! Olen itse käyttänyt Skillsharea useampien vuosien ajan ja opiskellut sitä kautta mm. maalausta, videoiden tekemistä, kädentaitoja ja kirjoittamista. Mikäli haluat Skillshareen, voit liittyä käyttämällä Skillshare referral-linkkiäni*. Saat tätä kautta kaksi ensimmäistä viikkoa maksutta. Muistathan lukea käyttöehdot ennen liittymistä!
Haluan kuitenkin tarjota kaavapaino-ohjeen myös niille, jotka eivät ole Skillsharen käyttäjiä, joten tässä ohjeet tiivistettynä kirjalliseen muotoon.
Mitä tarvikkeita kaavapainojen tekemiseen tarvitaan?
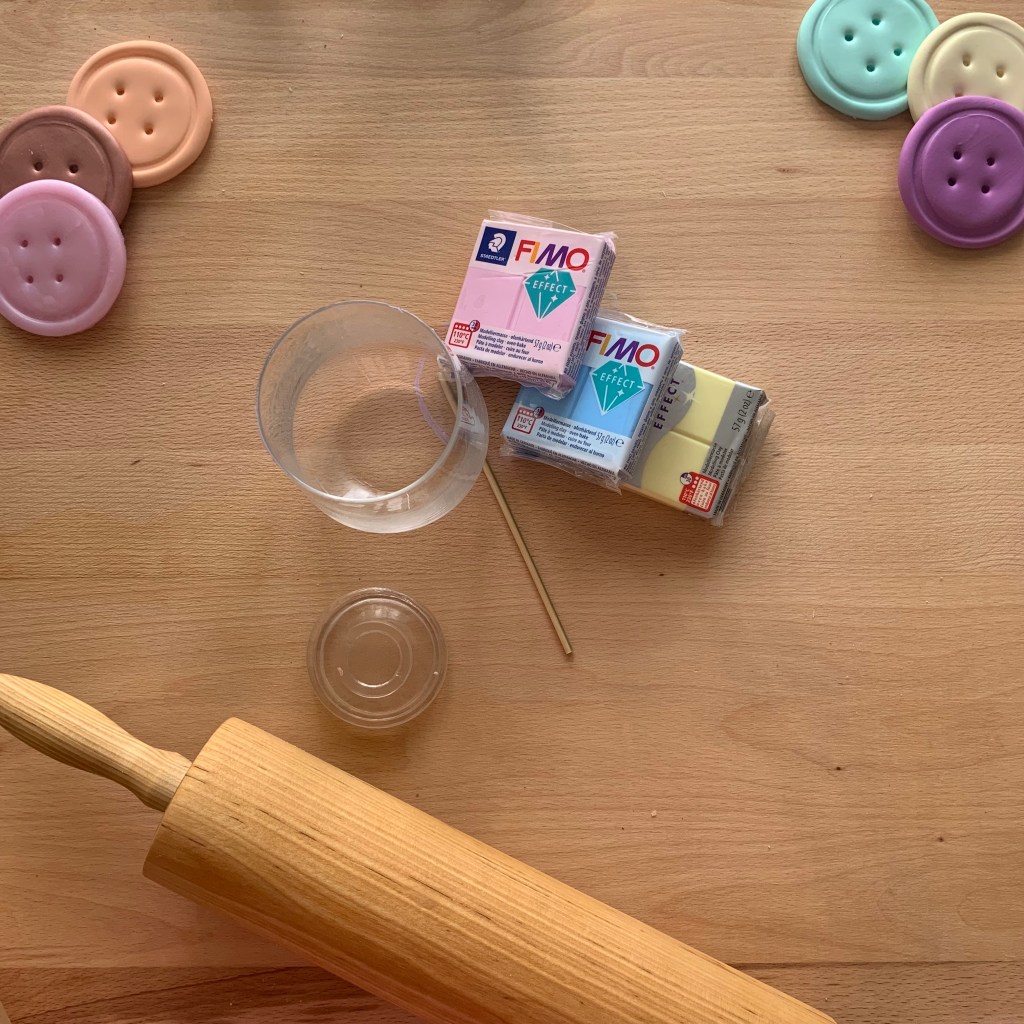
Tarvitset:
- Askartelumassaa, jonka voi kovettaa uunissa. Itse tykkään käyttää FIMO-massaa.
- Jotakin pyöreää, jolla voit painaa napin muodon. Itselläni on tässä ohjeessa käytössä lasi, jonka halkaisija on noin 6 cm.
- Jonkin pienemmän pyöreän esineen, jolla voit painaa hieman isompaa ympyrää pienemmän kehän napin pintaan.
- Pienen tikun, kynän tms. jossa on pieni pyöreä pää.
- Kaulin (vapaaehtoinen)
- Leivinpaperia
Ohjeet kaavapainon tekemiseen
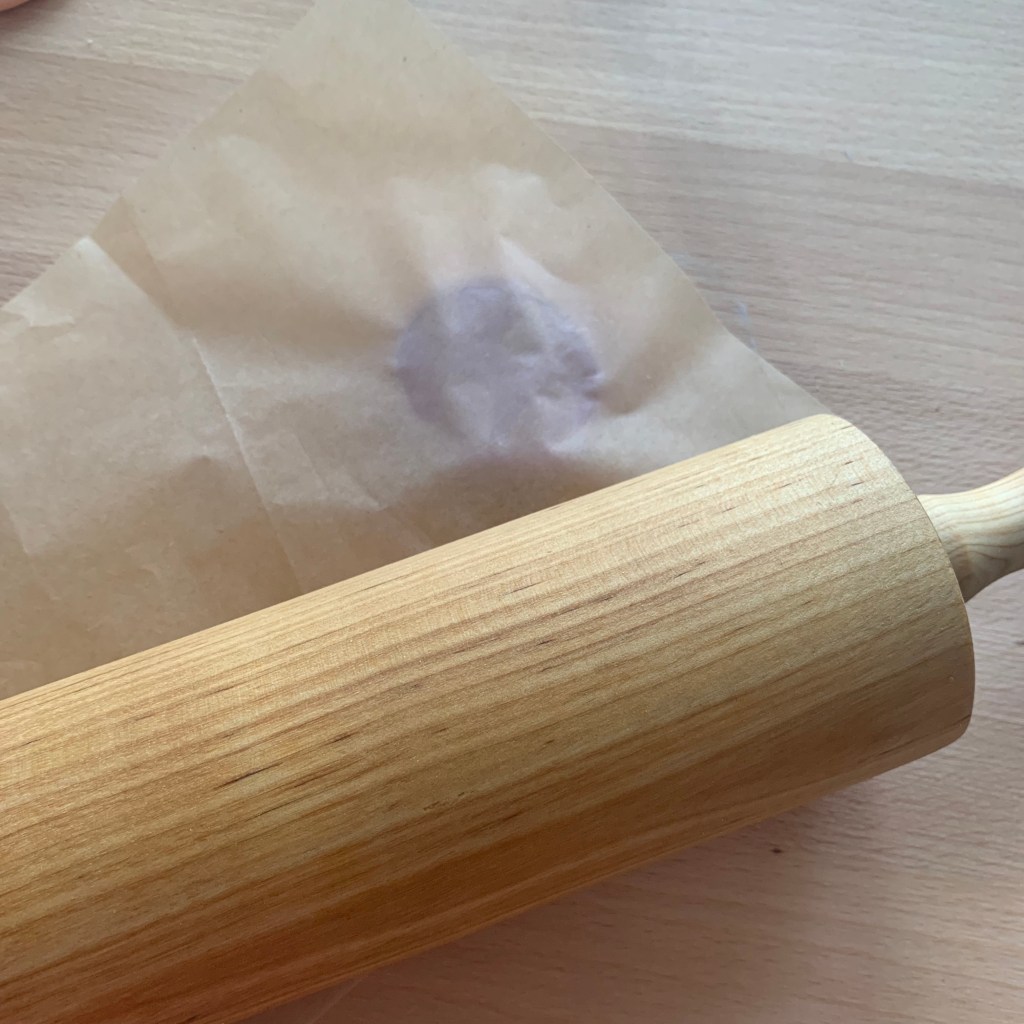
Litistä massa noin 5 mm paksuiseksi levyksi. Voit tehdä tämän joko ihan vain käyttämällä sormiasi, tai vaihtoehtoisesti kaulita massan sopivan paksuiseksi levyksi. Mikäli käytät kaulinta, käytä leivinpaperia kaulimen ja askartelumassan välissä.
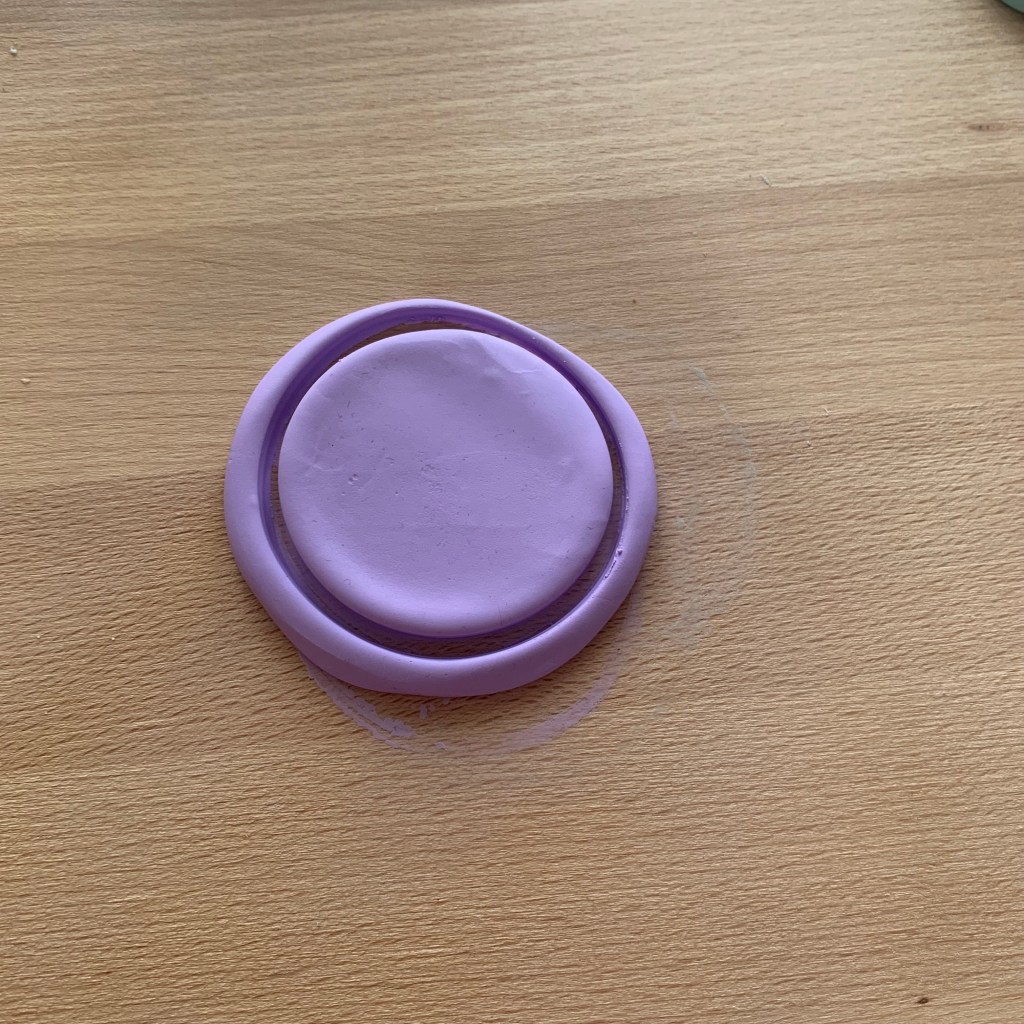
Paina levyyn ympyrä käyttäen isompaa ”muottiasi”. Tämä ympyrä tulee olemaan nappisi koko, joten pohdi mikä on itsellesi kaikkein kätevin kaavapainon koko. Itse tykkään näistä 6 cm kaavapainoista. Ne toimivat hyvin ohuiden ja keskipaksujen kankaiden kanssa.

Poista ylimääräinen massa ”napin” ympäriltä.
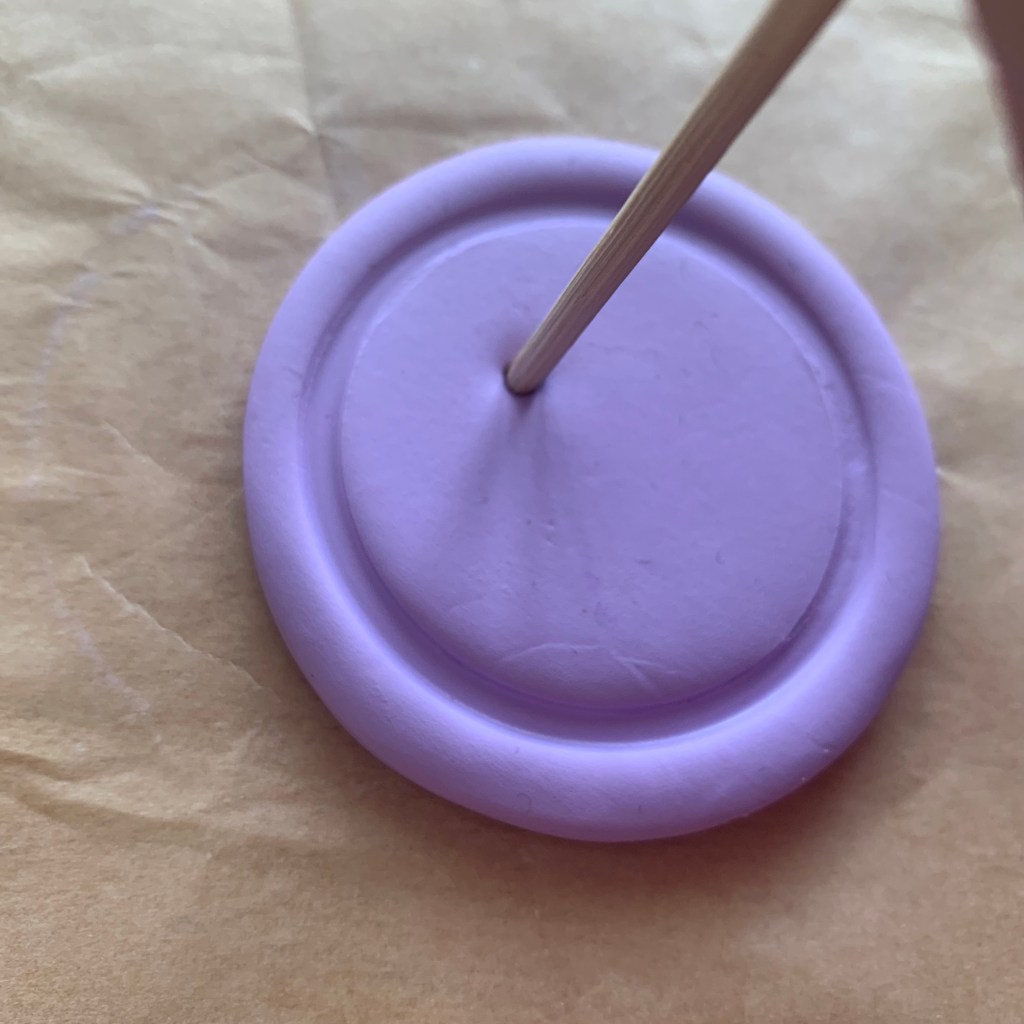
Paina nappiin pienempi kehä. Älä käytä tässä vaiheessa liikaa voimaa. Tarkoitus ei ole painaa tätä kehää koko napin läpi, vaan ainoastaan saada aikaan pieni painauma napin reunoille. Sinun ei pitäisi nähdä mitään jälkeä napin toisella puolella.

Tee nappiin neljä pientä ”reikää”. Kuten edellisessäkin vaiheessa, tarkoitus on saada aikaan pienet painaumat napin pintaan. Älä siis paina näitä pieniä reikiä koko napin läpi.
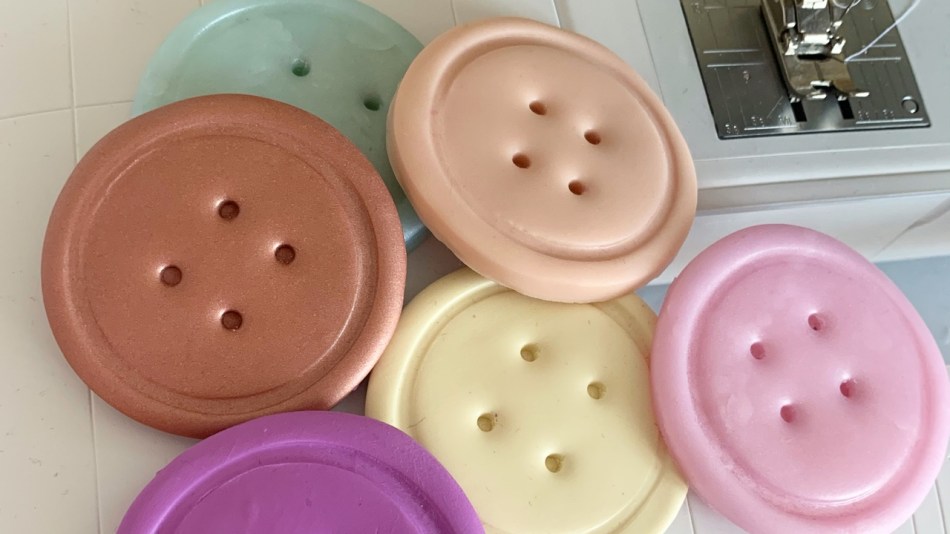
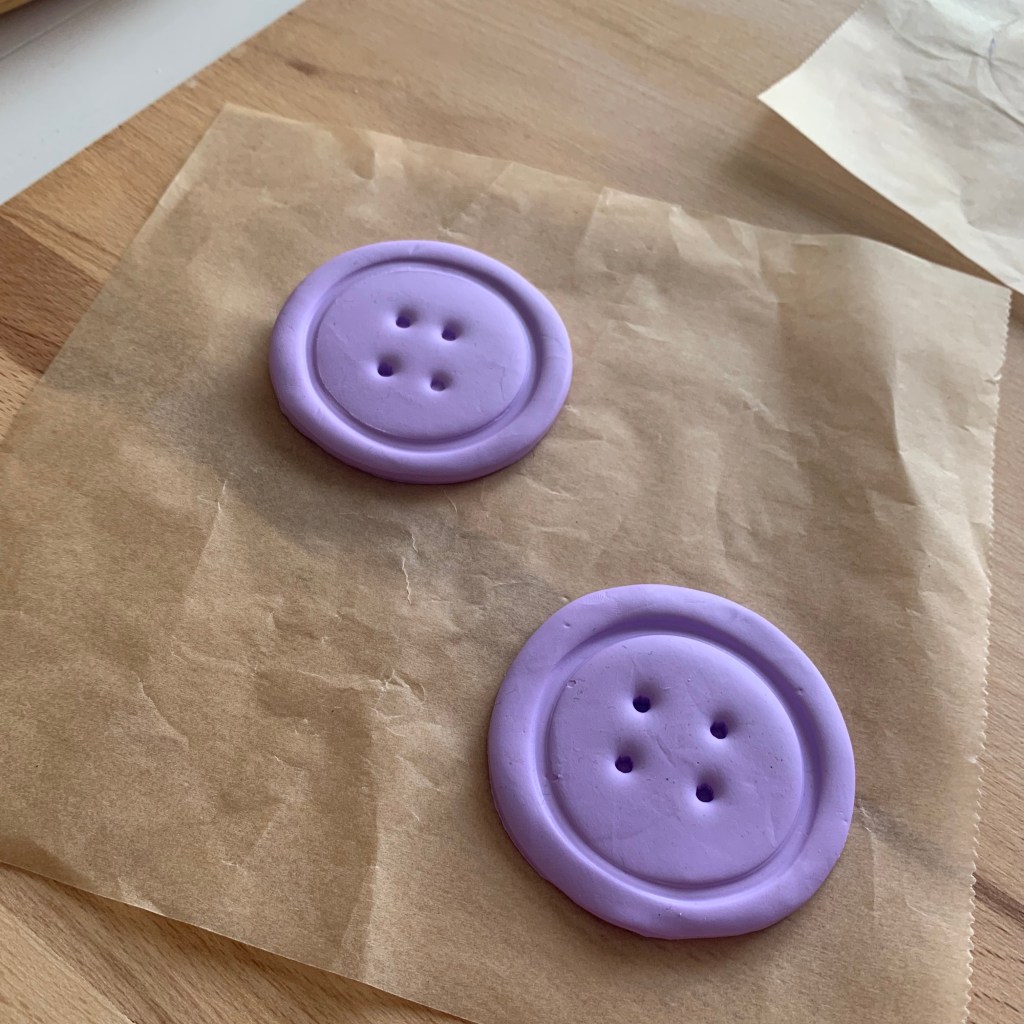
Napit ovat nyt valmiit!
Tarkista oikea paistolämpötila ja ohjeet askartelumassan paketista. Kaavapainot on tärkeä kovettaa uunissa, jotta ne pitävät lopullisen muodon ja kestävät käyttöä. Älä siis missään nimessä jätä tätä vaihetta vällin!
Jaa valmiit kaavapainosi Instagramissa ja merkitse minut postaukseesi (IG: ompeleomaonnesi). Odotan innolla, että näen millaiset napit sinun ompelupöydältäsi jatkossa löytyy!
* Huom. Mikäli liityt Skillsharen käyttäjäksi referral-linkkini kautta, saan Skillsharelta tästä pienen maksun. Tämä postaus ei kuitenkaan ole Skillsharen sponsoroima.
**********************************************
Welcome back to happy sewing! I have missed you my lovely sewing friends ❤
I will today share a highly requested pattern weight tutorial with you.
I have also made a video tutorial on how to make these pattern weights. The tutorial is available in Skillshare. So if you are already using Skillshare, please check it out and leave a comment and review. That would mean the world to me! And if you are not yet familiar with Skillshare, but would like to give it a try, I highly recommend you to do so. I have been using Skillshare for a long time, taking classes on crafts, video making, creative writing and painting. If you want to join Skillshare, you can use my Skillshare referral link*. You will get two first week’s free trial. Please remember to read the terms of use before joining!
But I would also like to provide this tutorial to all those who are not using Skillshare. That is why I also prepared this summary of written instructions.
What do you need to make these pattern weights?
You will need:
- Modeling clay that can be baked in the oven. I like to use FIMO modeling clay.
- Something round to make the button shape. In this tutorial I use a class.
- A slightly smaller round shape, that can be used to press a smaller circle on your button.
- Small stick, pen or something else with a tiny round ending
- Roll (not absolutely necessary)
- Baking paper
Instructions: How to make a pattern weight
Press the modeling clay flat. You should have it approximately 5 mm thick. You can either just use your hands and fingers. Another option is to use a roll to flatten the clay. If you want to use a roll, remember to cover the modeling clay with some baking paper.
Press a circle to the modeling clay by using you class or other round shape. This circle will be the size of your button, so take a moment to consider what would be your ideal button size. I like my 6 cm pattern weights. They work perfectly with light and medium weight fabrics.
Remove any excess modeling clay.
Press a smaller circle on your button. Don’t press too hard at this step. The idea is not to press this circle all through your button. You want to only see the circle on the right side of your button, and nothing should be visible on the wrong side.
Make four little ”holes” on your button. Just like in the previous step, you should only make these pressing marks visible on the right side of your button. Nothing should be visible on the wrong side, so don’t press through the modeling clay.
Your buttons are now finished!
Check the right baking temperature. Instructions should be available in the package of your modeling clay. It is very important to bake these pattern weights in the oven. This way they keep the shape and are durable. So don’t miss this step!
Share your finished pattern weights on Instagram and tag me in your post (IG: ompeleomaonnesi). I look forward to seeing these button shaped pattern weights on your sewing table!
* Please note: If you use my referral link to join Skillshare, I will get a small payment from Skillshare. However, Skillshare is not sponsoring this post.

0 comments on “Ohjeet kaavapainojen tekoon / Tutorial: How to make your own pattern weights”